RedMagic 9 Pro+ Teardown: Detailed Analysis and Key Upgrades
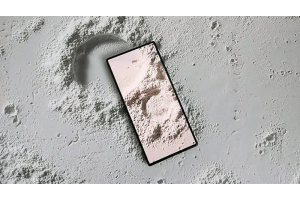
If you ask which of the recently released new phones is the best-looking or which phone's design is the most captivating, it definitely has to be the Red Magic 9 Pro+. It is truly a product that aligns with popular aesthetics. With simple lines and distinct edges, it has a front without any punch-holes and a back without any protrusions. As netizens have remarked, Red Magic has created the true MIX in the hearts of Mi fans. Do you like the design of the Red Magic 9 Pro+? Today, let's take a look at its internal structure and see how they managed to make the camera flush.


This device is the Red Magic 9 Pro+ Dark Knight Edition. Unlike those phones that are overly beautified in PPTs, the actual Red Magic 9 Pro+ looks even better than the official renders. For fans of this design style, it is exactly what you desire—a tech-savvy appearance, resembling those concept phones that once circulated online. To describe it in one word: "Cool!" However, while it looks good, it’s also quite uncomfortable to hold. Whether held horizontally or vertically, with one hand or two, comfort is out of the question. Because it uses almost no curves, it doesn't fit well in the hand. To ease this discomfort, using a protective case with a good hand feel is the only solution.

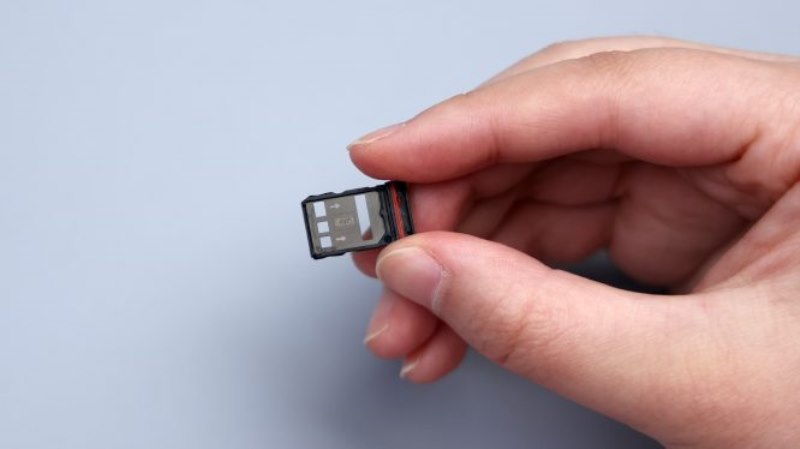
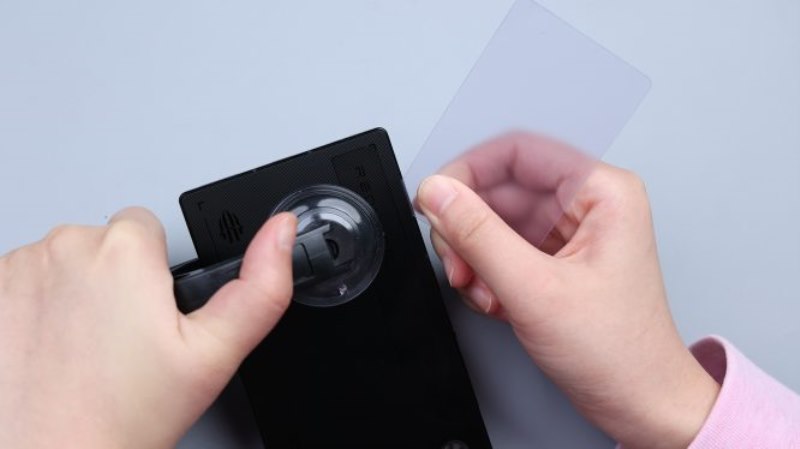
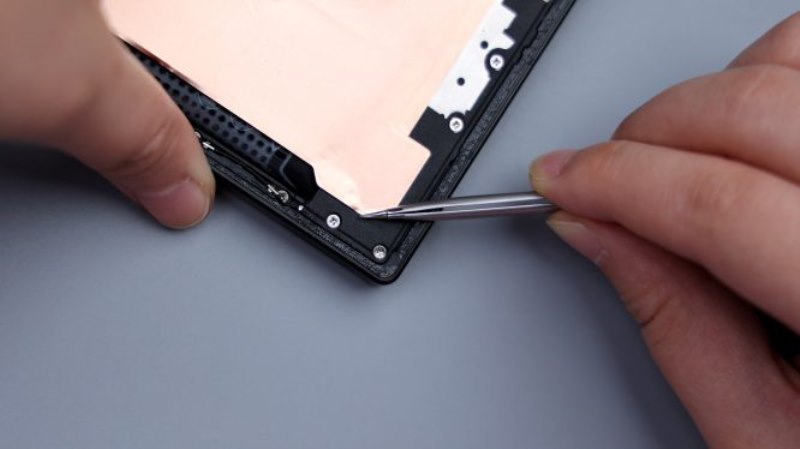
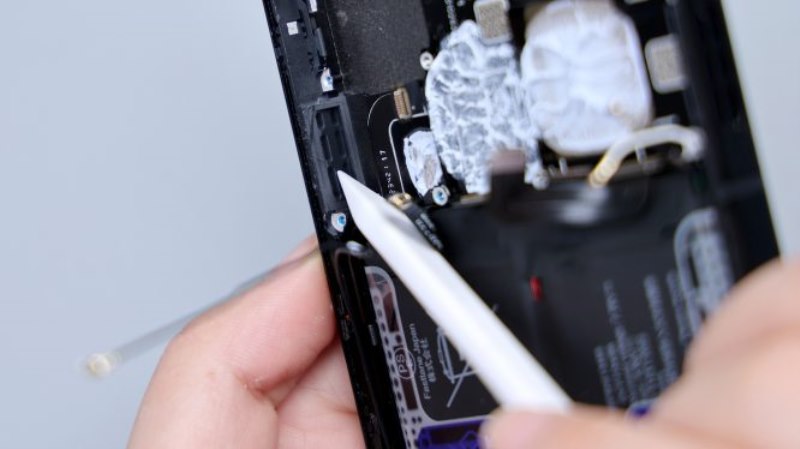
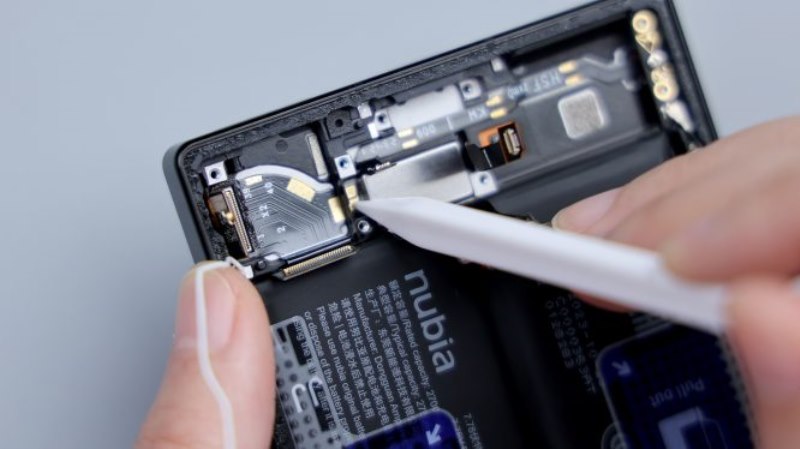
Let's start the teardown. After powering off, remove the SIM card tray from the bottom. It is made of metal and plastic, with a red rubber ring on the edge to help with dust and water resistance.


A flat glass back cover has three advantages for disassembly. First, it can be laid flat on the heating plate, ensuring even heating of the back cover and its edges. Second, a suction cup can be used to assist in opening the back cover, saving a lot of effort. Third, unlike curved-edge back covers that stick tightly, a flat back cover with softened adhesive can be easily pried open. As expected, the process of opening the back cover encountered no obstacles; it was effortless.

The inside edge of the back cover has a circle of adhesive, which is strong but not prone to wrinkling or clumping. The middle right side is slightly wider to reinforce it, while the upper left part is narrower due to limited space corresponding to the wind tunnel edge, but it doesn't affect the seal. The adhesive width is consistent elsewhere.

A flat glass back cover has another advantage—it’s easy to reassemble. Its structure and assembly method ensure this, with the metal mid-frame's inner edge recessed to match the glass thickness, allowing the back cover to fit perfectly into the frame.


As long as the adhesive isn't damaged during opening, it retains at least half of its stickiness, so you can reattach the back cover without adding more glue, making future battery replacements much easier. DIY users can follow tutorials to replace it themselves.

Since the back cover and the lens are one piece of glass, the camera area is flat, without the traditional DECO concept.

The camera area has only one metal inner frame, glued to the back cover for positioning and protection of the lenses.

The hollow semi-transparent numbers in the upper left corner allow light to pass through. Of the five holes on the right, the oval one in the upper left corresponds to the flash, with a black rubber ring around it to prevent light leakage.

There is also a metal decorative piece on the outside corresponding to this position. Besides aesthetics, it slightly elevates the phone when placed flat on a table, creating a small gap to protect the glass over the lens from scratches.

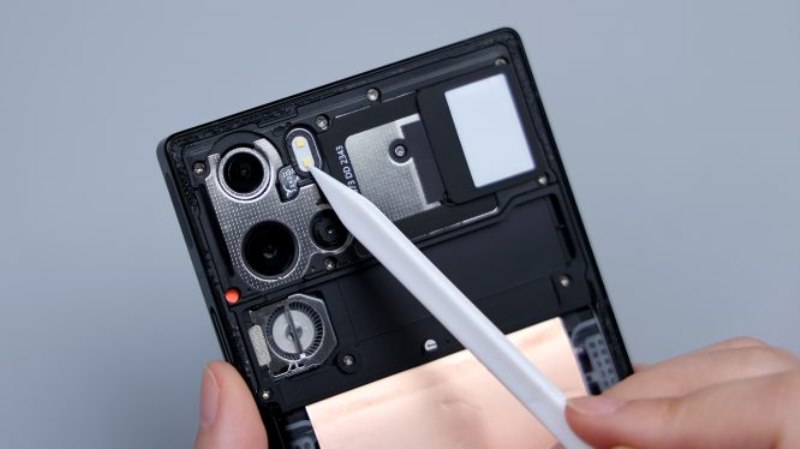
The three round holes correspond to the three rear cameras, all cushioned with foam rings, with thick conductive cloth in the middle for each. The bottom hole corresponds to the fan, with clear views of the blades and ambient lighting effects through the transparent hollow. The irregular foam ring corresponds to the cooling duct, providing cushioning and sealing. The large hollow foam in the middle corresponds to the battery and copper heat sink.

The phone's main frame edges still show adhesive residue, indicating its strong stickiness, ensuring easy disassembly without compromising sealing. The rear cameras are flush at the cover layer, with extensive exposed metal plates aiding heat dissipation and signal transmission.

The flash uses dual LED lights, with foam around the edges. The Red Magic 9 Pro+ adds NFC, with the coil in the middle extending to the cover's inner side. The white square on the right is the ambient light guide plate, with fixed screws at the corners of the cover.
There is a gap between the cover and the wind tunnel, with the cover pressed over the wind tunnel for fixation, judging by the height difference and screw positions at the edges.


The fan, located on the left, has a metal frame and fins, with an upgraded speed of 22,000 RPM, with a visible metal mesh at the air intake. A metallic spot in the middle of the wind tunnel with black paint seemed like a splash from talking until I realized it was paint, not a stain, much to the amusement of the cameraman.

A large copper foil covers the battery area and extends to the sound chamber, fixed with adhesive, with part of the LDS laser antenna visible in the lower right corner.
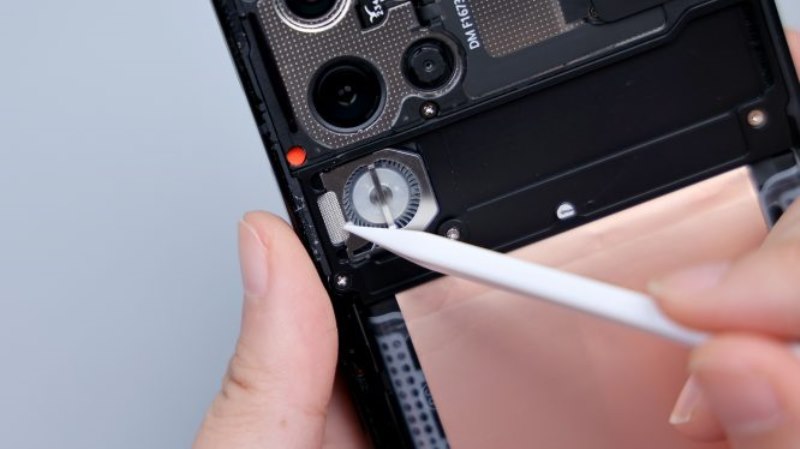

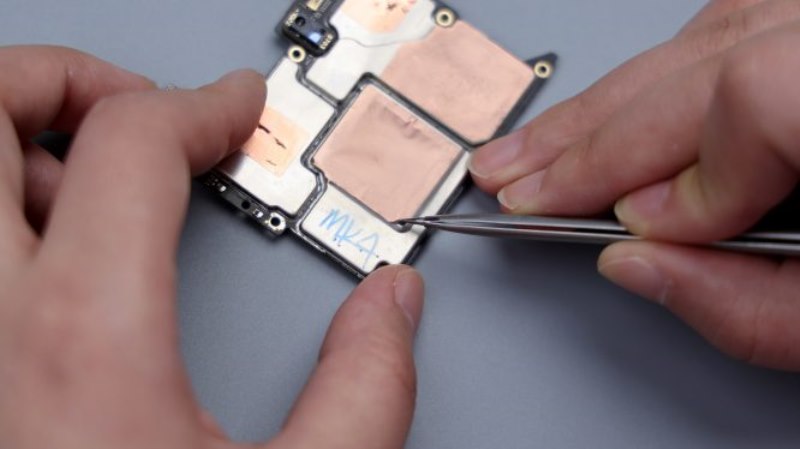
Slightly heating the cover loosens the adhesive on the light guide plate, making it easy to remove.


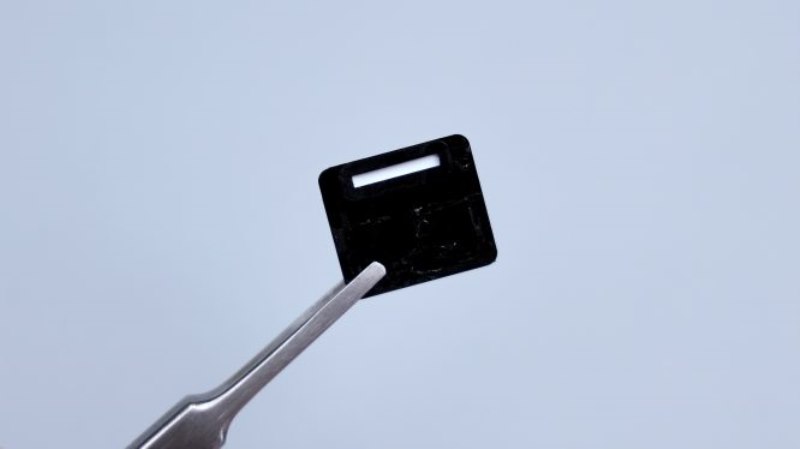
Its structure and principle are simple: most of the inner area is covered with black stickers, leaving a narrow strip for light concentration corresponding to the ambient light position. A foam ring next to it provides fixation and prevents light leakage. The outer black stickers leave a large blank area in the middle, concentrating light to form a light panel, visible through the hollow semi-transparent numbers and letters on the back cover.

One detail: the Deuterium Knight Transparent Edition has 2 LED lights for ambient lighting, while the Dark Knight Edition has 3, theoretically making it brighter.


Peel off the adhesive from the bottom copper foil, unscrew all the screws fixing the cover and wind tunnel, pry up and remove the cover, disconnect the fan's BTB, and then dismantle the wind tunnel.


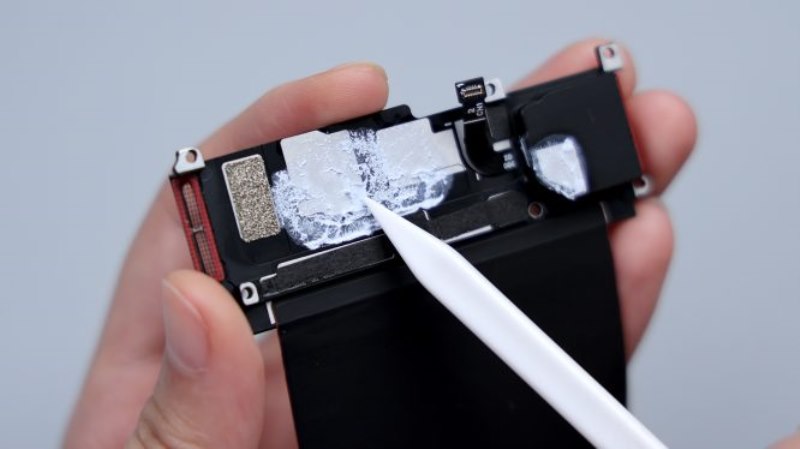
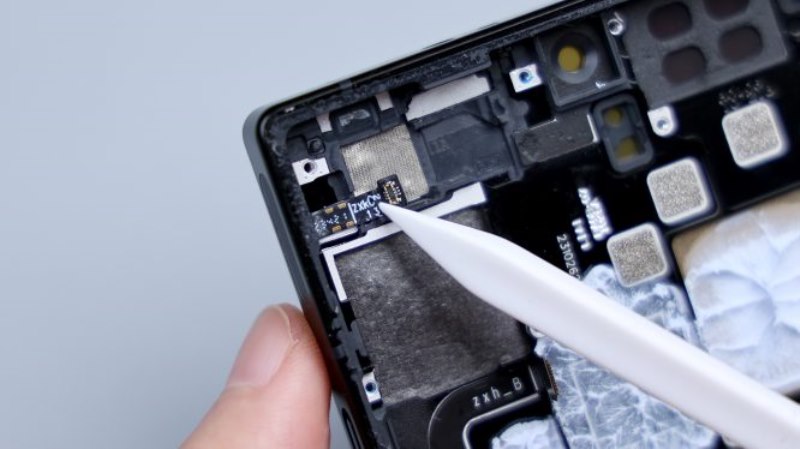
The cover is made of plastic and metal, with four contact points for the ambient light in the upper left corner, a whole piece of LDS laser antenna next to it, and the speaker from AAC Technologies integrated into the cover, model 1115K, connected to the motherboard via two contact points in the lower right. The foam pads in the middle correspond to the front camera and its BTB. The remaining rear cameras also have foam cushioning, with the main camera receiving extra protection with thick conductive cloth at the corners. Two contact points above the macro lens correspond to the NFC coil, while three points in the upper right correspond to the flash.

Next to the main camera, there is part of the LDS laser antenna, extending to the side of the cover.
There are red rubber rings at the positions of the air inlets on both sides of the wind tunnel, enhancing the airtightness of the wind tunnel.

There is a lot of thermal paste residue inside the wind tunnel. Besides reinforcing the structural strength, the use of metal materials also aids in heat dissipation. The fan area also has thermal paste, indicating thorough heat dissipation considerations. The long foam pad below corresponds to the row of BTB connectors on the lower part of the A-side of the motherboard. Inside the copper foil, there is also a layer of graphite heat dissipation stickers to improve heat dissipation efficiency.

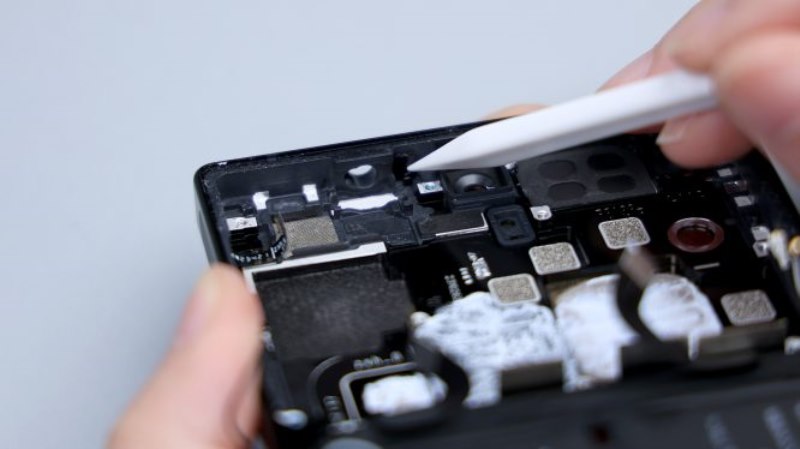
The heights of the three rear cameras are almost the same. On the back of the front camera and the ultra-wide-angle camera's BTB, there is conductive cloth. The headphone jack is sandwiched between them, the infrared emitter is to the right of the headphone jack, and the speaker has a hollow foam pad at its corresponding position. Next to it is the noise-canceling microphone, protected by a metal cover.


The core area of the A-side is covered with copper foil, with thermal paste applied to assist heat dissipation. The fan area also shows residue of thermal paste.

In the lower row of core BTB connectors, the battery has two interfaces. Three coaxial cables are connected to the right edge, with one black cable running through the mainboard and extending downward along the left side.

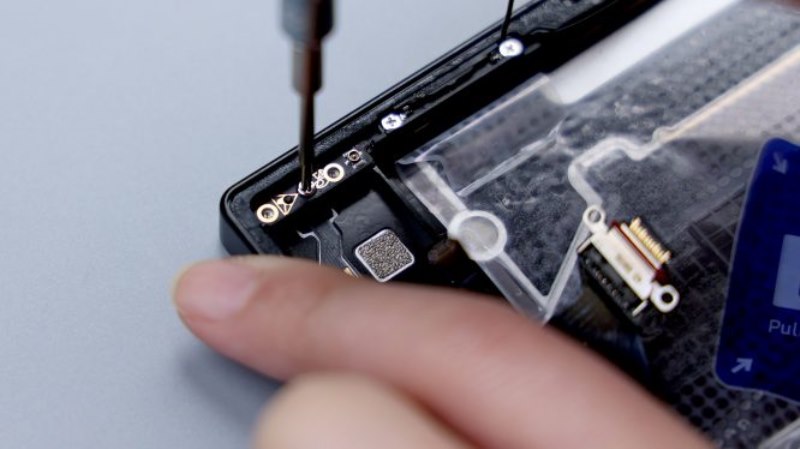
Unlike common phones, the side buttons do not use contact connections but are connected to the A-side of the motherboard via an FPC. To avoid the fan, the FPC is rounded, with the BTB interface marked with two small letters "ON." There are screws with integrated nuts at the upper right and lower left, serving as both cover and motherboard fixing screws.


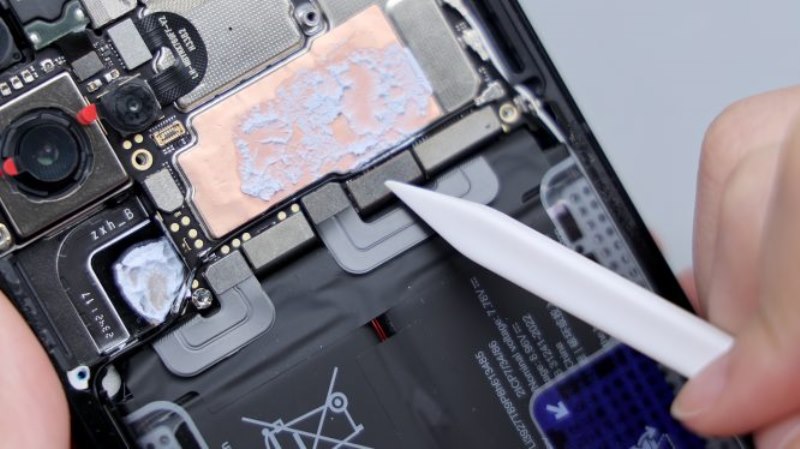
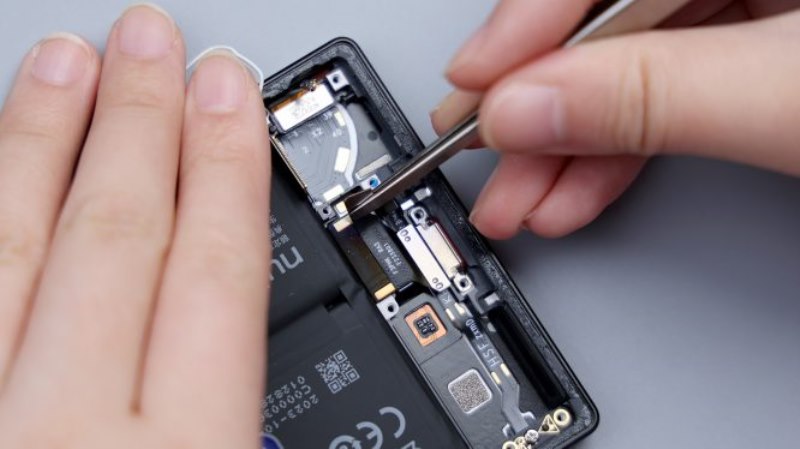
Disconnect the battery, main and secondary board FPCs, USB interface, power button BTB, and the three coaxial cables on the right. Tear off the conductive cloth on the back of the front camera, disconnect the BTB, and remove it.


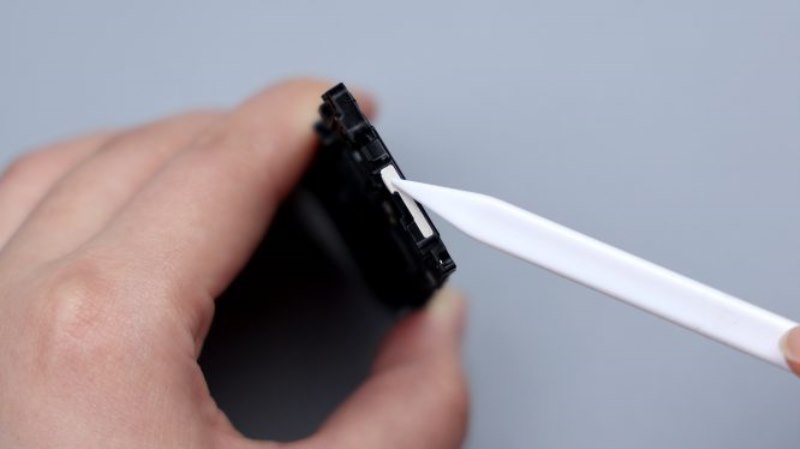
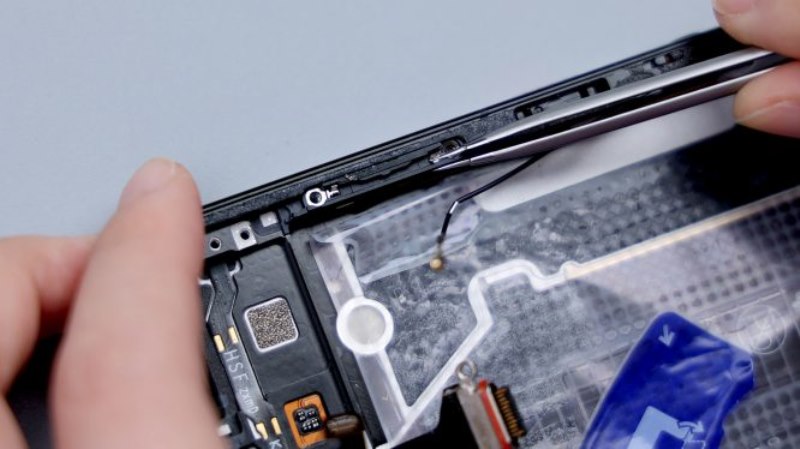
Next, handle the headphone jack. It's tightly fitted, so be careful during disassembly to avoid damaging the FPC. If the headphone jack fails later, it can be replaced separately.
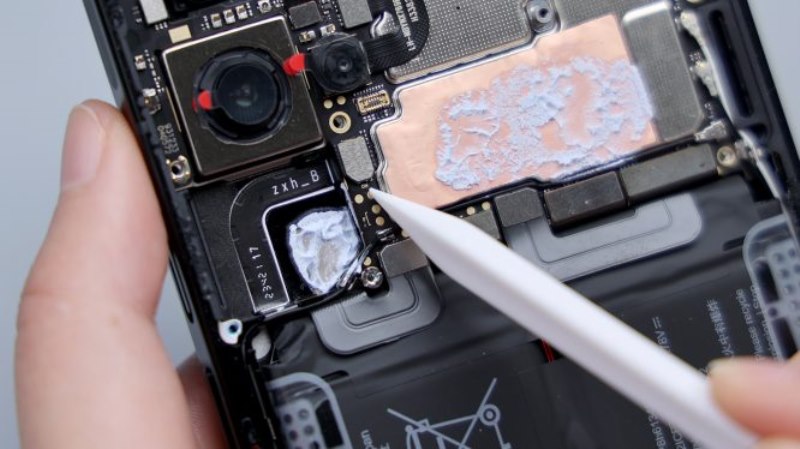
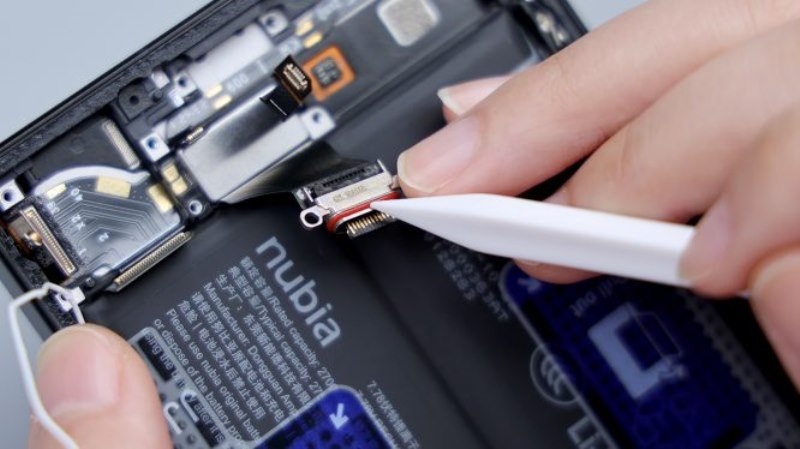
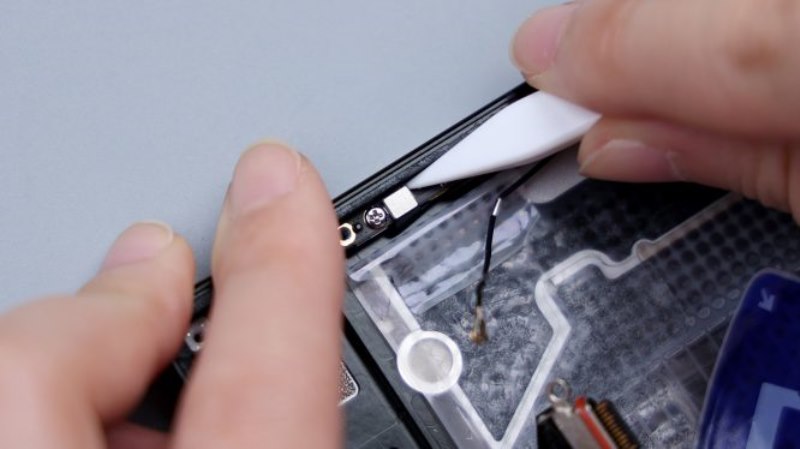
Disconnect the ultra-wide-angle and macro lens BTBs, and the macro lens can be directly removed. The A-side does not show the main camera's BTB, which is likely on the B-side due to limited space for the base. Next to the battery BTB is a yellow adhesive tape, with a motherboard fixing screw underneath. Remove it and the other two screws with integrated nuts to pry up and remove the motherboard.


Indeed, the main camera's BTB is connected to the B-side. Disconnect and remove it, then pry up and remove the ultra-wide-angle lens glued to the frame with tweezers.
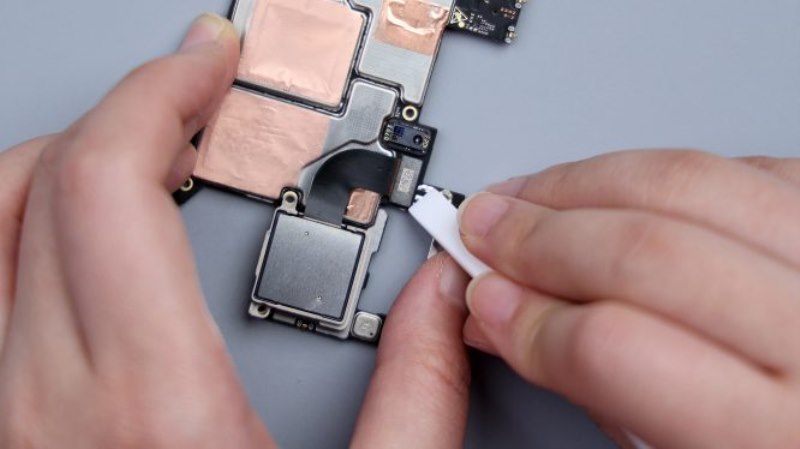
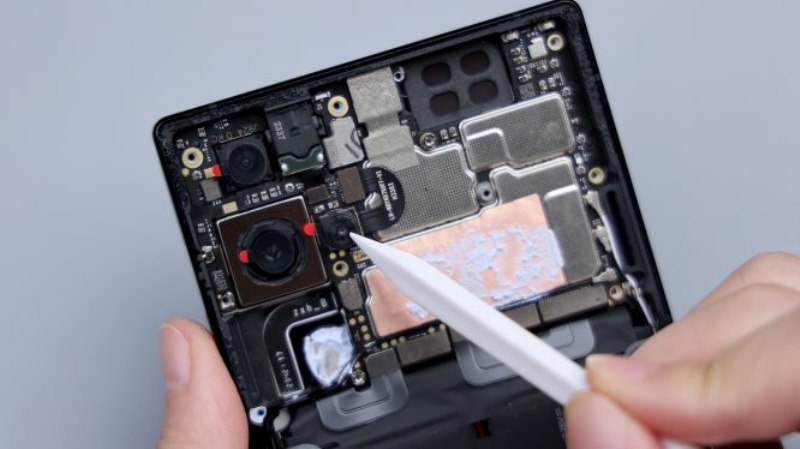
The four cameras are gathered together: a 50MP Samsung GN5 main camera with a 1/1.57 inch sensor, the same as the previous generation but with a redesigned lens assembly adding OIS optical stabilization, appearing larger but actually thinner to reduce lens height and make the back cover flat; a 50MP Samsung JN1 ultra-wide-angle lens with a 1/2.76 inch sensor; a 2MP GalaxyCore GC02M1 macro lens with a 1/5 inch sensor; and a 16MP OmniVision OV16E1Q front camera using under-display algorithm 4.0 technology.

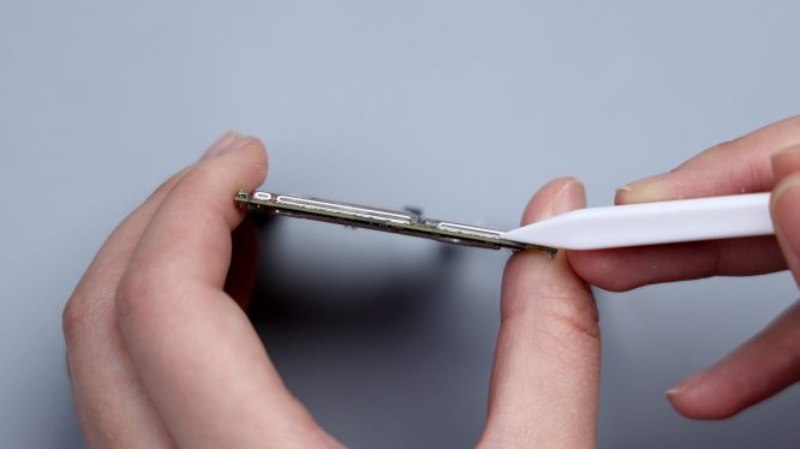
Back to the motherboard, it uses a single-layer PCB, reinforced with metal sheets at the headphone jack and other weak points.

All BTB bases on the A-side lack foam or rubber rings, and capacitors and small components are not glued. Red Magic placed protective measures inside the cover and wind tunnel, using foam pads to cushion BTB connectors.

The Red Magic 9 Pro+ adds infrared functionality, with the emitter located above the ultra-wide-angle lens BTB. The B-side is similar to the A-side, with the main camera's BTB base lacking foam rings and small components not glued. The noise-canceling microphone hole is in the upper left corner, and the front ambient light sensor is integrated into the PCB, raised with a stacked layer. Most shielding covers have copper foil, and thermal paste is applied to the core area for heat dissipation.

Tear off all the copper foil to reveal another layer of heat dissipation material underneath, improving efficiency. The most prominent component on the B-side is the Micron LPDDR5X RAM, with the green chip below it being the Qualcomm Snapdragon 8 Gen 3 processor. Next to it is a similarly sized Toshiba UFS 4.0 flash memory chip, and on the other side of the processor is the Qualcomm PM8550 power management IC.

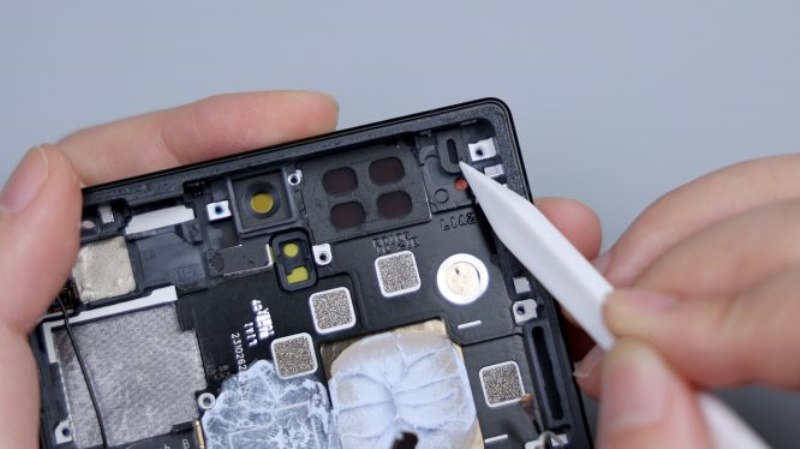
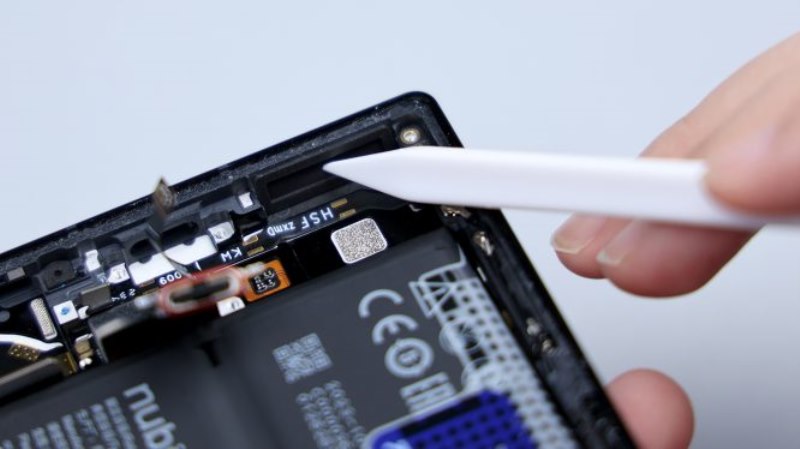
After removing the motherboard, the empty frame still has many small details. The FPC in the upper left corresponds to the gaming shoulder buttons, and the headphone jack has a dedicated positioning design, making it tightly fitted.
Next to it is a foam pad corresponding to the main camera's BTB, with foam rings cushioning the front camera and noise-canceling microphone. The ambient light sensor has a rubber ring at its corresponding position.


The processor, fan, and main camera positions on the metal frame are recessed, with the processor and fan areas directly contacting the VC heat spreader, hence the extensive use of thermal paste.


The main camera is recessed to lower the lens height, avoid protrusion, and ensure a flat back cover. These recessed areas also help control the phone's thickness and prevent excessive vertical space occupation. The two side air inlets are beveled to match the corresponding wind tunnel positions, improving the wind tunnel fit and airtightness.

Moving to the bottom, unscrew all the fixing screws in the secondary board area, pry up and remove the cover, which integrates the speaker connected to the secondary board via two contacts on the right. It also comes from AAC Technologies, model 1115K, matching the same size and model as the top speaker, forming a stereo dual 1115K speaker setup. The inside of the cover has four foam pads corresponding to three BTBs and the vibration motor on the secondary board.


Disconnect the shoulder button, fingerprint recognition, and main-secondary board FPC BTBs, along with two coaxial cables. Unscrew the fixing screws on the secondary board, pry it up, and remove it.


Like the motherboard, the secondary board has no foam or rubber rings around the BTB bases, and capacitors and small components are not glued. The microphone is integrated into the secondary board, protected by a metal cover, and the USB interface is reinforced with a metal sheet.

Tear off the FPC of the shoulder button, pry up and remove the USB interface, connected directly to the motherboard via an FPC. The interface is USB 3.2 Gen 2 standard, wrapped in a dust and water-resistant rubber ring.
Foam rings are set at the corresponding positions of the speaker and microphone on the frame, with a foolproof design below to avoid wrong pin insertion and microphone damage.

The vibration motor is glued to the frame, connected to the secondary board via two contacts. Next to the shoulder button is a small PCB fixed with one screw, and the separate black coaxial cable is connected to it.

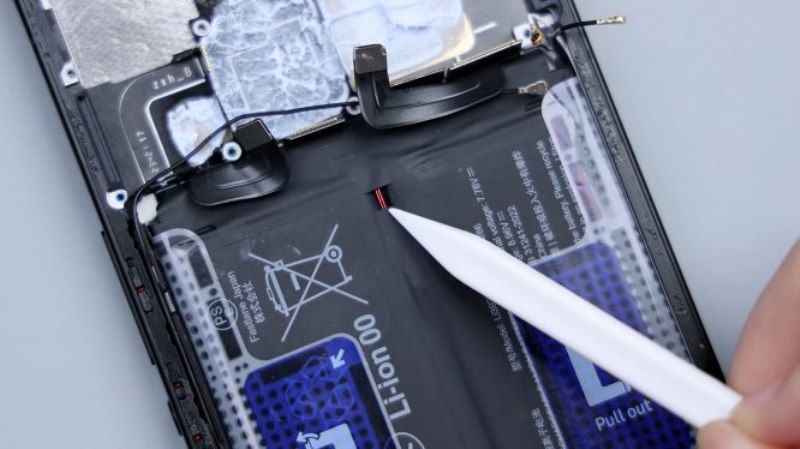
In the middle upper position of the battery, you can see two thin red wires, which are NTC temperature sensors. The battery uses an easy-pull quick-release design. Follow the diagram to peel off the adhesive tape, making sure to peel it off completely without breaking it in the middle.

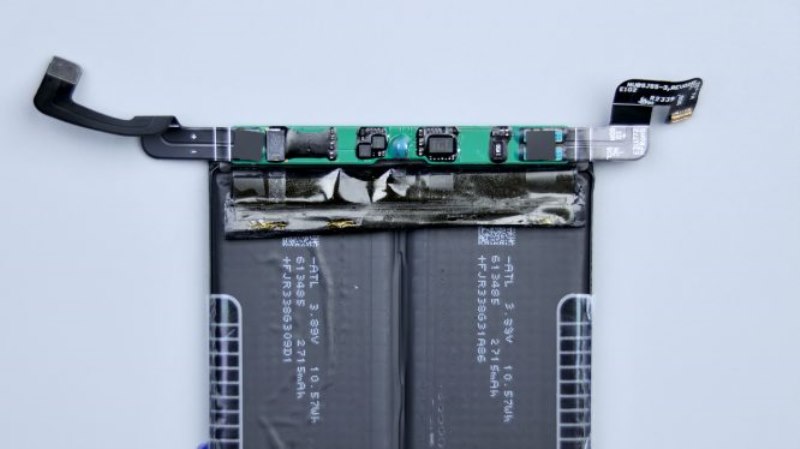
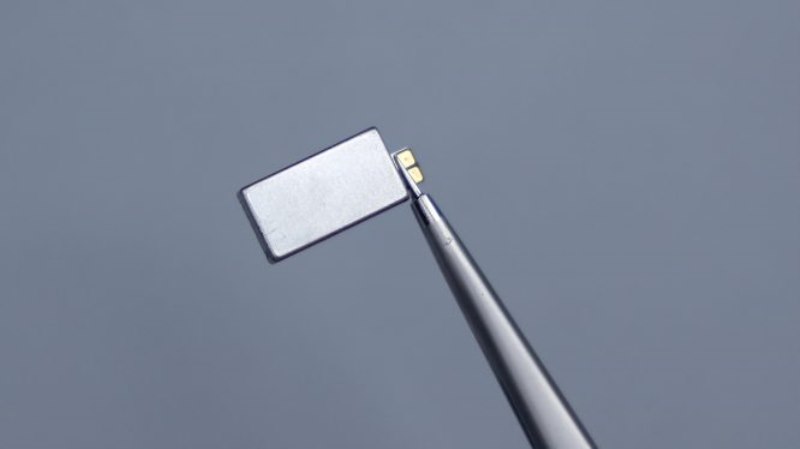
If done correctly, the battery can be easily removed. The Red Magic 9 Pro+ battery uses a dual-cell, dual-interface solution, with an equivalent total capacity of 5500mAh and supports 165W wired fast charging. It is manufactured by Dongguan New Energy Technology Co., Ltd., with battery cells supplied by ATL. Inside the black adhesive tape at the top of the battery, there is a green PCB wrapped, which integrates the battery interface's FPC and battery management chip. The two NTC temperature sensors are also connected to it.

After removing the battery, you can pry up and remove the vibration unit, which is also an X-axis linear motor from Hengdian DMEGC, model LM0815B. From actual experience, it is not as good as the previous generation's dual X-axis linear motor. The vibration feedback of the Red Magic 9 Pro+ is somewhat downgraded, mainly due to changes in the ID structure that compressed the internal space, making it difficult to accommodate dual motors. As a compromise, a single long motor was used, although the supplier remains the same as the previous generation.

Next, handle a few small edge components. Disconnect the single black coaxial cable, unscrew the fixing screws, and remove the PCB. Underneath the coaxial cable are two more fixing screws. Lift the coaxial cable, unscrew the fixing screws, and remove the black cable slot. Below it is another PCB. Disconnect its BTB connector, unscrew the single fixing screw, and remove the PCB, which has a microphone integrated on it. The opening is located on the side frame to avoid blocking the upper and lower microphones during landscape gaming, which could affect sound reception. There is a large hollow area under the battery compartment that directly contacts the VC heat spreader, assisting in battery and FPC heat dissipation.

At this point, the teardown of the Red Magic 9 Pro+ is basically complete. Its overall structure is similar to the previous generation, with not much change in the division of major areas. The adjustments and optimizations are mainly focused on some details.

The rear camera module has been moved from the middle to the left, with three lenses and the flash arranged in a matrix rather than a vertical line, improving motherboard utilization. The lenses are recessed and no longer protrude from the back cover.

The number of RGB light strips has been reduced from three sets to one. This time, the wind tunnel is placed under the cover and also handles part of the heat dissipation for the A-side of the motherboard. The fan is no longer separately assembled but integrated with the wind tunnel. The flash has been upgraded from a single LED to a dual LED, and an NFC coil has been added to the cover. The fan speed has been increased from 20,000 RPM to 22,000 RPM, and infrared remote control functionality has been added. The main camera interface has been moved from the A-side of the motherboard to the B-side and upgraded with OIS optical stabilization. The ultra-wide-angle lens has also been upgraded from 8MP to a 50MP Samsung JN1. The number of fixing screws on the motherboard has been increased from two to three, and the processor has been upgraded to the Snapdragon 8 Gen 3. To control the thickness of the device and avoid protruding cameras, the frame areas corresponding to the processor, fan, and main camera are recessed. The bottom speaker has been changed from 1216 specifications to 1115 specifications. The Type-C interface has been upgraded to USB 3.2 Gen 2 standard. The vibration unit has been downgraded from dual X-axis linear motors to a single lower motor. The battery assembly now includes an easy-pull quick-release design for user convenience in self-replacement, with the capacity increased from 5000mAh to 5500mAh. The connection method for the upper and lower shoulder buttons has been changed from contact points to FPC + BTB direct connection. From a teardown perspective, the Red Magic 9 Pro+ shows improvements in workmanship, materials, craftsmanship, detail handling, and internal integration.

The only downside might be the vibration unit. The previous dual X-axis linear motor combination was quite distinctive and advantageous, with a noticeable reduction in user experience. For future products, I think there are two options to consider: one is to further optimize the internal structure to free up space and return to dual motors; the other is to continue with the single motor design but upgrade the motor specifications to improve the experience, such as using a larger, higher-spec motor from a more mature supplier like AAC Technologies.

As for making the back cover flat, this was mainly achieved by recessing the frame and compressing the camera module size, as mentioned during the teardown.

This design places very high demands on the glass, requiring it to meet two conditions simultaneously: high structural strength and rigidity, being sturdy and durable, drop-resistant and scratch-proof, and meeting the optical requirements of the lens with sufficient clarity and light transmission. Red Magic likely invested significantly to achieve this effect. From an aesthetic standpoint, Red Magic's pursuit of perfection and dedication is commendable. If one does not have strong preferences for fast charging and memory combinations, the Red Magic 9 Pro offers better value. Most Red Magic phone buyers are heavy gamers, and in situations where the processor, screen, and heat dissipation configurations are the same, an additional 1000mAh battery capacity is far more practical than 165W fast charging, and 12GB of RAM is generally sufficient.
Related Products


Recent Posts


Popular Posts